What is a sprite packer?
Let's say you're working on a 2D game, and you want to draw some sprites to the screen. The game is small, so you don't have too many objects to worry about: an animated character, tiles for the level, maybe a few objects to collect and interact with.
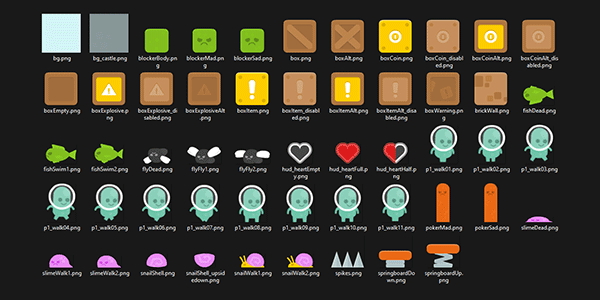
Even for a small game, that can be a lot of files to keep track of. The video above has over 350 separate sprites. How are you supposed to keep everything organized and rendering efficiently, especially when your project starts growing in scope?
The answer is to use a texture atlas. A texture atlas is a common technique used in computer graphics whereby several smaller images are combined into a single larger image. In game development, this is sometimes called a sprite sheet or a sprite atlas.
The organizational benefits should be obvious: using a texture atlas means you don't have to juggle folders full of images to render your game. In fact, it wouldn't be unreasonable for a small game to have all of its graphics assets stored in just a single image file. But historically, the reason we use texture atlases is for performance. Your computer's graphics card can only store a limited amount of textures in memory at a time, and constantly swapping the textures stored in memory is a costly operation at 60 frames per second. By using a texture atlas, you can draw the same texture over and over again, but draw different sub-regions of the texture each time, which is drastically more performant. That might sound crazy if you're new to graphics programming, but it's true!
And so, with that in mind, let's create a sprite packer to turn our folder full of sprites into a texture atlas.
Why write one from scratch?
Depending on your needs, there is no reason to reinvent the wheel here. Several game engines ship with exactly this functionality (Unity's Sprite Atlas for instance), and there are even engine-agnostic tools like TexturePacker.
But I'm going to make a case for writing your own. Maybe you want to fully automate the atlas creation, so that you don't have to do a bunch of clicks to import your files. Or maybe you're working with a file format that requires you to export your images in a particular way (Asprite, Photoshop) which slows down iteration.
Writing your own is not too difficult, and you'll end up with an incredibly flexible tool that can be custom-tailored to your exact needs.
How does it work?
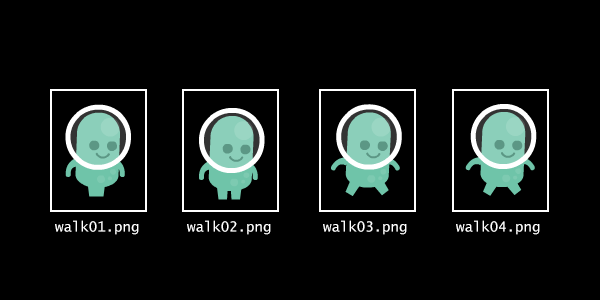
Creating and using a texture atlas is a pretty straightforward process. First, you start with the sprites you want to draw. For this example, we'll use the first 4 frames of a character animation:
Next, you place each sprite in a single file (your texture atlas):
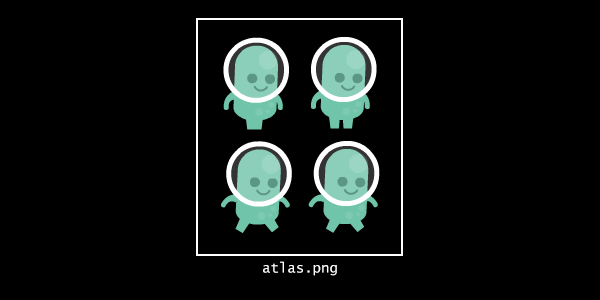
And finally, to render them in your game, you only draw a sub-region of the atlas. By moving the sub-region around the atlas, it looks like you're drawing a different image entirely.
Project setup
This project is going to be written in Python. If you're not familiar with Python, don't worry - none of these concepts are language-specific. I'll explain all of the logic involved in writing the sprite packer, so you can follow along in any language you're familiar with.
At the time of writing this tutorial, I'm using Python 3.12 on Windows 11. There may be some small differences if you're on a different Python version and/or operating system.
Start by creating a folder for your project - I'm calling mine sprite_packer.
Inside the project folder, create 2 empty text files: main.py and requirements.txt.
Next, we need to add the Pillow package to our project requirements. Pillow is an image processing module that we'll use to read and write the image files.
Write the following in your requirements.txt file:
pillow
Okay, that was easy! Next, we are going to create a virtual environment to keep our project dependencies isolated.
Inside your project folder, run this command to create your virtual environment and install the Pillow module:
python -m venv venv
./venv/Scripts/activate
python -m pip install -r requirements.txt
The last thing we need are some sprites. If you already have sprites from your own game, feel free to use those. For this tutorial, I'm going to borrow some from Kenney's Platformer Art Deluxe asset pack.
We're all ready to get started! Your project folder should look something like this:
sprite_packer/
  sprites/
  venv/
  main.py
  requirements.txt
Starting the sprite packer script
Alright, it's time for the main event!
Open your main.py file.
We're going to start by scanning our sprites folder to build a list of all our sprites.
Start your main.py file by writing the following code:
from pathlib import Path

from PIL import Image


# Build sprite list
sprites_folder = Path("./sprites")
sprites = []
for file in sprites_folder.iterdir():
    if file.suffix == ".png":
        sprite = Image.open(file)
        sprites.append(sprite)
Here, we're just iterating over the contents of the sprites folder and using Pillow to read each .png file as an image.
Next, let's write the sprites to an atlas image. This is going to be wrong, but don't worry, we'll refine the process later. I'm a visual learner, so I like to have results I can see as early as possible, that way I know what my code is doing.
Add this code to create the atlas image:
# Create atlas
atlas_size = (1024, 1024)
atlas = Image.new(mode="RGBA", size=atlas_size)
Next, add this code to write the sprites to the atlas:
# Testing: Add sprites to atlas
max_width = max([s.width for s in sprites])
max_height = max([s.height for s in sprites])
x = 0
y = 0
for sprite in sprites:
    atlas.paste(sprite, box=(x, y))
    x += max_width
    if x > atlas_size[0]:
        x = 0
        y += max_height
And finally, add this code to save the atlas file:
# Save the atlas file
atlas_file = Path("./atlas.png")
atlas.save(atlas_file)
Let's run python main.py to run the script and take a look at our atlas.png file:
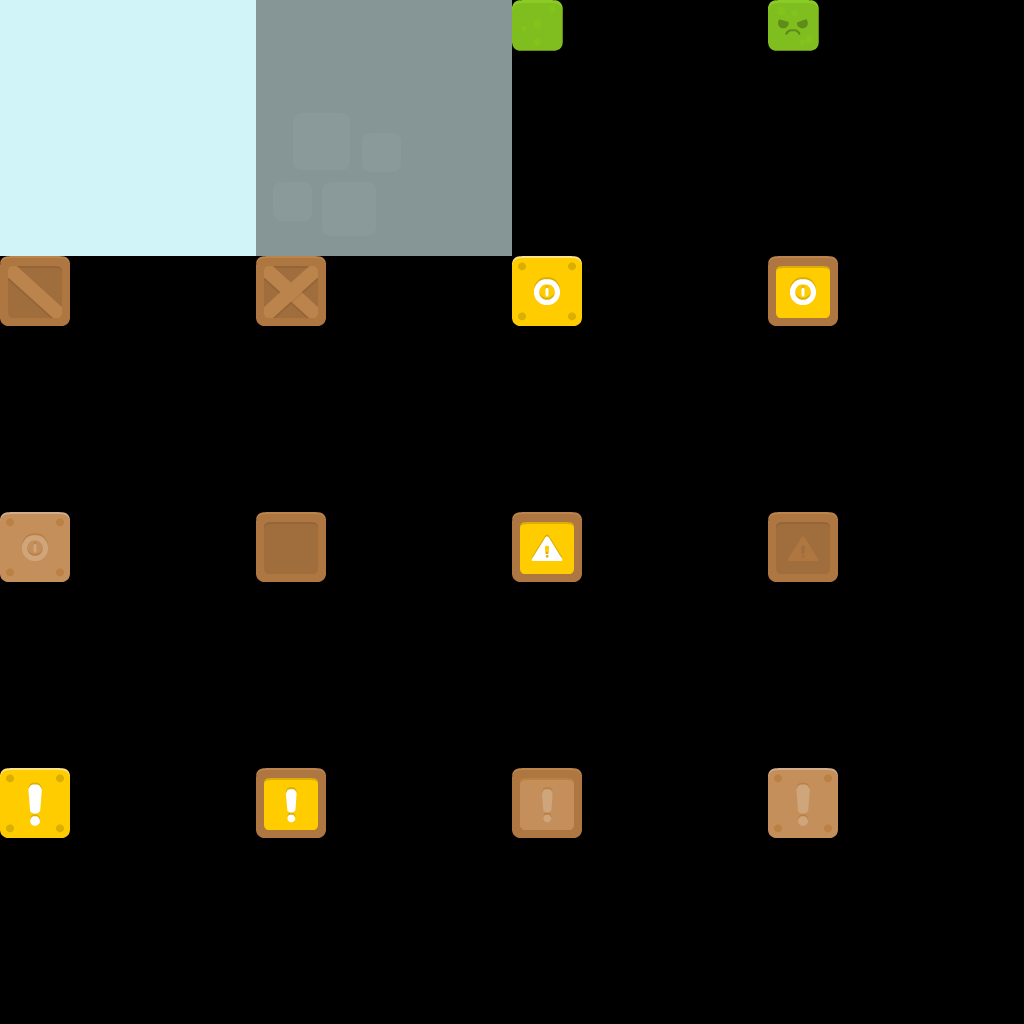
Okay, yeah, like I said - this is going to look wrong. Most of our sprites didn't make it onto the atlas. Also, there is a ton of wasted space between each sprite.
Let's back up a sec and look at what our code is doing.
First, we calculate a grid size by getting the maximum width and height of all sprites (in my case max_width and max_height are both 256).
Next, we define an x and y coordinate for the position that the sprite should be drawn.
Then, we use atlas.paste() to draw the sprite onto the atlas.
Finally, we update our coordinates to the next spot on the grid.
This is certainly one approach that we can take, and it works okay for a really small set of images, like our character animation example from earlier. But it leaves a lot to be desired: the larger the sprites are, the larger the grid becomes, and therefore the more space we can potentially waste. Also, we're going to have to keep guessing at the size of our atlas image, and update the code when we run out of space.
A better packing algorithm
How do we come up with a better way to place our sprites onto the atlas?
That question is... complicated, and it turns out there's a whole area of mathematics dedicated to fitting rectangles inside other rectangles - it's called bin packing. Did your eyes glaze over reading that article? Don't worry, you're in good company.
But hey, now we know the name for the thing, and that means we can start searching for answers.
There is a great paper called A Thousand Ways to Pack the Bin - A Practical Approach to Two-Dimensional Rectangle Bin Packing by Jukka Jylänki that describes several ways to solve this problem. I like the paper because it uses clear language and it also has pictures that describe each approach. Hopefully that link to the paper stays available. If not, you should be able to find it on Google Scholar.
Read the paper. Skim it at least - you'll learn a lot, and you might find an approach you like better than the one I'm going to show here. We're going to look at the Guillotine algorithm - specifically the horizontal split approach.
The Guillotine algorithm
The Guillotine algorithm solves the bin packing problem with the following steps:
- Start with an empty area
- Place a rectangle inside
- Cut a line in the leftover space to create two new empty areas
- Repeat steps 2 and 3 until you've placed all your rectangles
That's all there is to it! In our case, the "empty area" that we start with is our atlas, and the "rectangles" we pack inside will be our sprites.
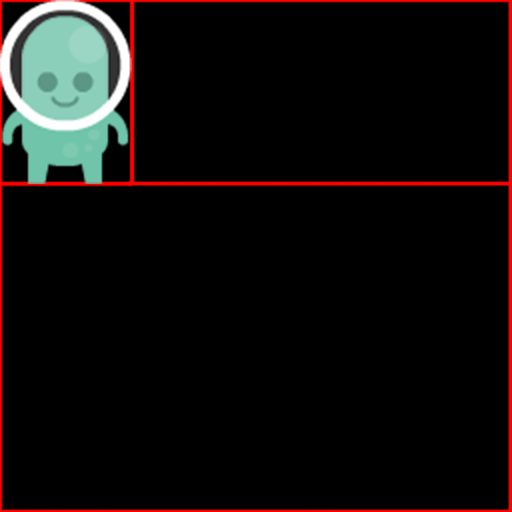
Let's look at the Guillotine algorithm in practice. Here we have 5 sprites to pack into an atlas:

We start by placing the first sprite into the upper-left corner of the atlas:

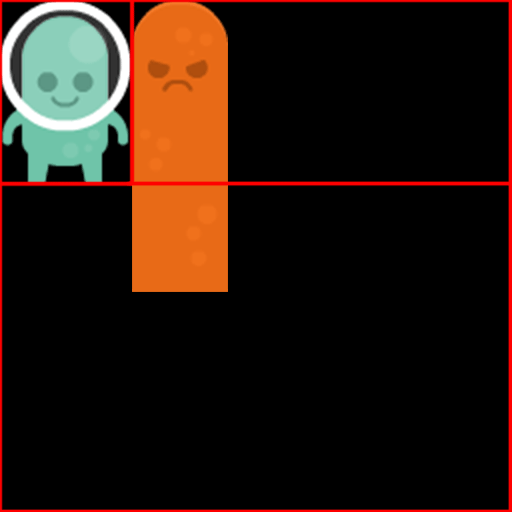
Now that we've placed the first sprite, we're left with a large backwards-L-shaped area. If you extend the edges of the newly-placed sprite, you're left with either a horizontal or vertical line to split the area:

Does it matter which way we cut it? I guess it might, but I don't think it matters much for what we're doing. Let's make the cut horizontally:
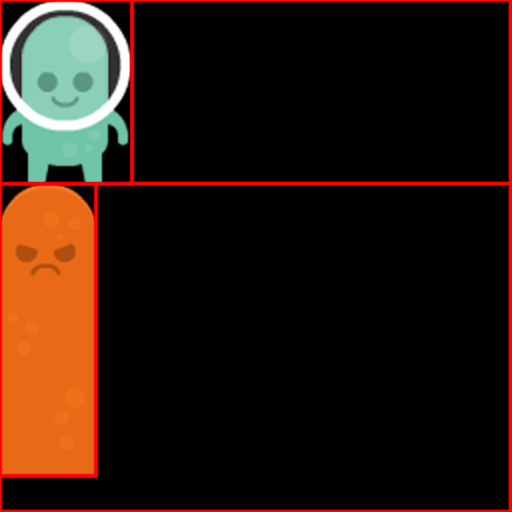
Now we're left with 2 empty areas, and we can repeat the process with the next sprite. See why it's called Guillotine cutting?
Time to place our next sprite on the atlas. Rather than just 1 empty area to choose from, we now have 2 to check. Let's try the first:
Uh-oh, he doesn't fit! Let's try the next area:
Great, he fits! We can cut the space horizontally again, and now we're left with 3 empty areas:

This is all it takes to implement the Guillotine algorithm - for every sprite, you just keep checking for an empty area. Once you find one that it fits in, place the sprite and cut the area into 2 more spaces. Repeat until you've placed each sprite:
Now you might be thinking: "What happens if the next sprite doesn't fit in any of the available spaces?" The first thing that I would suggest is to sort your sprites before placing them on the atlas. I have found that calculating each sprite's area and sorting from largest to smallest works pretty well. Larger sprites cut up the available space into larger chunks, and makes it easier to fit the smaller sprites later.
If you still can't fit your sprites after sorting them, then your atlas is too small, and you need to increase the area.
Rewriting the sprite packing code
Okay, now that we understand what we need to do, let's go back to our Python script.
Delete the block of code that starts with # Testing: Add sprites to atlas.
We're going to rewrite the logic using what we learned from the Guillotine algorithm.
Let's start by sorting the sprites from the largest to the smallest area. That will make our sprite packing more space-efficient:
# Sort sprites from largest to smallest area
sprites.sort(key=lambda s: s.height * s.width, reverse=True)
Let's also edit our atlas_size to start off smaller (we'll grow it later if it runs out of space):
# Create atlas
atlas_size = (512, 512)
...
Next, we need to keep track of a list of empty areas to place our sprites inside. Before we place any sprites, the area is just the size of the atlas image:
# Empty areas in the atlas
area = (0, 0, atlas_size[0], atlas_size[1])  # (x, y, w, h)
areas = [area]
We'll store each area as a tuple of (x, y, width, height), but you could also make a Rect or Area class to make it more legible.
Now it's time to implement the Guillotine algorithm:
# Pack sprites using the Guillotine algorithm
for sprite in sprites:
    # Find an empty area
    area = None
    for a in areas:
        x, y, w, h = a
        if sprite.width <= w and sprite.height <= h:
            # Add the sprite to the atlas
            atlas.paste(sprite, box=(x, y))
            area = a
            break

    # Area not found
    if area is None:
        print(f"Couldn't fit sprite {sprite.filename}")
        continue

    # Split the area into new top and bottom areas
    x, y, w, h = area
    top = (x + sprite.width, y, w - sprite.width, sprite.height)
    bottom = (x, y + sprite.height, w, h - sprite.height)

    # Update the area list with the two new areas
    areas.remove(area)
    areas.append(top)
    areas.append(bottom)
This is the same process that we just looked at, only it's written in code instead of visually. We start by iterating over the entire list of sprites. Then, we iterate over each area until we find one that is at least as wide and as tall as the sprite is. If we find that area, we paste the sprite and break out of the loop.
Notice that if we couldn't find an area for the sprite, we just skip adding the sprite entirely. We'll come back to this in a minute - this is where we'll write the logic to resize the atlas.
Finally, we create two new areas from the remaining space in the area that we just chose.
Let's run that code and see what we get:
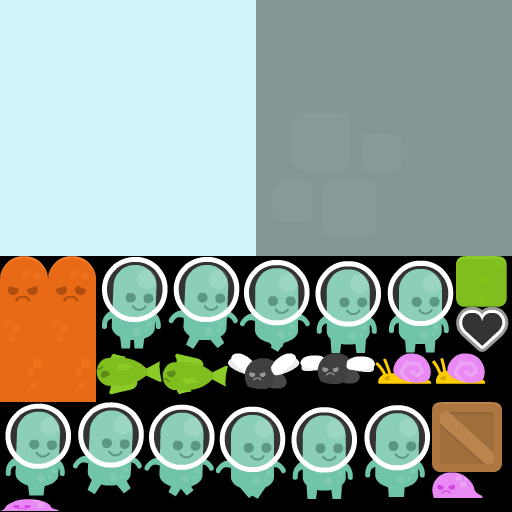
That looks way better already! We cut the resolution of the atlas in half (a 4x reduction in area), and yet we're able to fit almost twice the amount of sprites as our first attempt. Notice how placing the largest sprites first has left plenty of room for the smaller ones afterwards. The little pink slime was even able to squeeze into the very bottom.
But I also got a few dozen warnings about sprites not fitting on the atlas:
Couldn't fit sprite ./sprites/boxAlt.png
Couldn't fit sprite ./sprites/boxCoin.png
Couldn't fit sprite ./sprites/boxCoinAlt.png
...
Let's fix that.
Resizing the atlas
When our algorithm is unable to find a space for a sprite, we need a way to resize the atlas.
You could handle this elegantly - create a new atlas image, copy the sprites to the new atlas, and then resize all of the areas to fit the new dimensions.
We're going to do something way simpler.
Any time our algorithm fails to place a sprite, we're just going to start over with a larger atlas. It's a bit inefficient, but this algorithm runs pretty fast, so unless you have a ton of images, it's not going to matter.
Start by wrapping the entire atlas creation code in a while loop
# Create atlas
atlas_size = (512, 512)
while True:
    atlas = Image.new(mode="RGBA", size=atlas_size)
    packing_failed = False

    # Empty areas in the atlas
    ...
Notice we added a boolean variable packing_failed = False at the beginning of the loop.
Next, update your code to increase the atlas_size if an area for the sprite couldn't be found.
You also need to set packing_failed = True:
# Area not found
if area is None:
    packing_failed = True
    atlas_size = (atlas_size[0] + 64, atlas_size[1] + 64)
    print(f"Resizing atlas to {atlas_size}")
    break
I'm increasing the size by 64 pixels each time, but depending on the size of your sprites, you may want to increase that number. Larger increases will find a solution more quickly, but may result in an atlas that's larger than it needs to be.
Finally, at the end of the loop, after iterating through all of the sprites, check to see if the packing failed. If not, break out of the loop:
...

# Break the loop if we placed all the sprites
if not packing_failed:
    break
With our resizing update, let's run the script one more time:
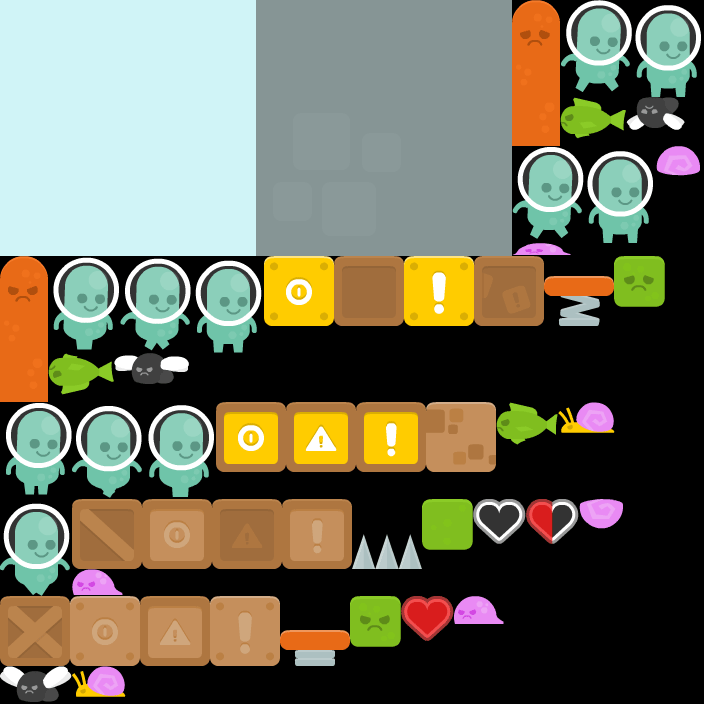
Beautiful! Looking at the script output, the atlas was resized 3 times before it found a solution:
Resizing atlas size to (576, 576)
Resizing atlas size to (640, 640)
Resizing atlas size to (704, 704)
Finished packing 53 sprites
Writing the sprite data
You may have noticed I've been avoiding a pretty big question up until now: How do we actually use the atlas in a game? Remember waaaay back at the beginning of this tutorial when we saw the simple walking animation?
In order to actually draw the sub-regions of the atlas, we need to write some more information. Specifically, we need to know the names of all the sprites in the atlas, and where they're located.
I debated how to write this section, because it's incredibly implementation-specific. Here's where I landed: I'm going to show you a simple way to write the sprite data to a JSON file. It's a format that can be parsed easily in many languages, and it's what I use in my own engine. But just like the rest of the tutorial, you should really adapt this to your own needs, and write the data in a format that fits best into your engine. (For example, if I was going to be using this in Unity or MonoGame, I'd probably choose to export this data as an XML file).
We're on the home stretch, let's go!
First, we need to import the json module at the top of the file:
import json
Next, add a variable called sprite_data at the beginning of the while loop, and initialize it as an empty dictionary:
# Create atlas
atlas_size = (512, 512)
while True:
    atlas = Image.new(mode="RGBA", size=atlas_size)
    sprite_data = {}
    packing_failed = False
When you add a sprite to the atlas, store its position and size in the sprite_data dictionary.
Use the name of the sprite as a key so you can access it by its original file name:
# Add the sprite to the atlas
atlas.paste(sprite, box=(x, y))
sprite_name = Path(sprite.filename).name
sprite_data[sprite.filename] = {
    'x': x,
    'y': y,
    'w': sprite.width,
    'h': sprite.height
}
area = a
break
At the very end of the script, after saving the atlas image, add this code to also save the JSON file:
# Save the sprite data file
sprite_data_file = Path("./data.json")
with open(sprite_data_file, 'w') as fp:
    json.dump(sprite_data, fp, indent=True)
Now when you run the script, you'll also see a data.json file in your project, which will have the name and position of every sprite in the atlas:
{
  "bg.png": {"x": 0, "y": 0, "w": 256, "h": 256},
  "bg_castle.png": {"x": 256, "y": 0, "w": 256, "h": 256},
  "pokerMad.png": {"x": 0, "y": 256, "w": 48, "h": 146},
  "pokerSad.png": {"x": 512, "y": 0, "w": 48, "h": 146},
  "p1_walk01.png": {"x": 48, "y": 256, "w": 72, "h": 97},
  "p1_walk02.png": {"x": 0, "y": 402, "w": 72, "h": 97},
  ...
}
Where do we go from here?
The goal of this tutorial was to explain what a sprite packer does and how texture atlases are used to draw images. Now that we've covered that, and gotten some experience writing a sprite packer, there's a bunch of different directions you could go. If you're using a Python framework, such as Pygame, you could start using this code exactly as-is. If you're using a commercial game engine, you can use these concepts to build a custom importer - Unity for example has a ScriptedImporter to help you achieve this.
I really hope you use what you've learned here to implement the things that you want for your own projects. If you got to the end of the tutorial and thought "Could this scan more than a flat folder structure?" or "Could this support Photoshop files?" or "Could this be rewritten in Rust?" The answer is YES - go make it happen!
If you liked this tutorial and want to see a more fully-featured version of this sprite packer, check out sprak. It's the sprite packer I wrote and use in my games. Its features include:
- Transparent edge trimming
- Support for
.pngand.asepritefiles - Pack multiple source folders
- Scan nested folders for files
- Render a video of the sprite packing (it's what I used to create the video at the beginning of the tutorial)
And finally, for those of you who just scrolled all the way to the bottom to get the script, here ya go: main.py